-1.png?width=360&height=66&name=Untitled%20design%20(4)-1.png)
This article applies to the following role permissions: ConexED Administrator - Director - Group Manager - Faculty/Staff - Front Desk Agent
Virtual Workshops give users the opportunity to host interactive online sessions that can accommodate a larger number of attendees compared to Virtual Meetings. Creating a Workshop for yourself or a Faculty/Staff member in your Group is a simple process that can be done directly from the Group Calendar.
1. Start by selecting your Group from the Scheduling tab on the left side navigation menu:
2. By default, you will be directed to your Group's Calendar tab. From there, navigate to the date you want to schedule the Workshop for.
3. To create a Workshop, simply click (or click and drag) on an available time slot on the calendar for the staff member who will be moderating this Virtual Workshop. This will bring up the Event Creation modal where you will select "Workshop":
4. Enter a title and description, modify the start and end time if necessary, and select "ConexED Video Meeting" for the location. Once you've entered the necessary details, click the "Create Workshop" button:
5. Once you have successfully created the Workshop, you will see it appear on the calendar. To add attendees (guests), click on the newly created Workshop on your Group Calendar to bring up the Appointment Details modal. From here, click on the "Edit Attendance" button:
6. Click the "Add Attendees" button to bring up the Add Attendees popup:
.png?width=564&height=332&name=Add%20Attendees%20(Edit%20Attendance).png)
In this popup, you can search for users by name, email, or SIS ID. Additionally, you can add multiple attendees at once by importing a spreadsheet with their email addresses or SIS IDs (follow the instructions provided in the popup for details on how to upload a file)

After clicking the "Add Selected" button or the "Import File" button, all attendees you have added will be displayed under the "Meeting Attendees" section on the page:
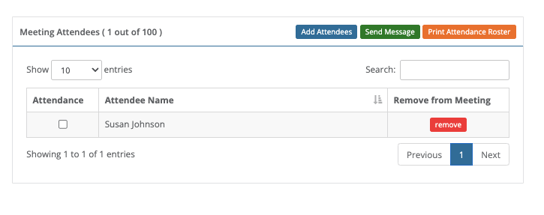
After being added, attendees will receive an email confirmation with a link to join the Workshop at the scheduled date and time. Attendees can also access the Workshop link, view details, and cancel their registration by visiting their Schedule & View Event Meetings page under the Scheduling tab on the left-hand side navigation menu.
It's important to note that in a Virtual Workshop, only 3 users can share audio and video simultaneously. The Workshop Moderator can manage this by going to the User's tab, clicking on the three vertical dots next to the user they want to promote, and selecting "Promote". Once promoted, the user can share their audio and video with other attendees. Users can also be demoted to allow another user to be promoted.