Master Reason Codes are created, stored, and edited in the campus repository, which is accessed via the Scheduling Control Center. This article applies to the following role permissions: ConexED Administrator & Director.
Reason Codes
Students are prompted to identify the reason for their visit when scheduling an appointment, entering a virtual lobby, or checking into an on-campus meeting queue using the Kiosk. They choose from a list of Reason Codes in the ConexED system. Reason Codes are also used to track data regarding the interaction in the appointment details.
This article will describe how ConexED Admins and Department Directors can create and edit the master list of reason codes using the Scheduling Control Center.
Scheduling Control Center - Create and Edit
Open the Scheduling Control Center and select the Reason Codes tab. Click Create Reason Code as shown in Figure 2 to open the Add Reason Code form.
Figure 2
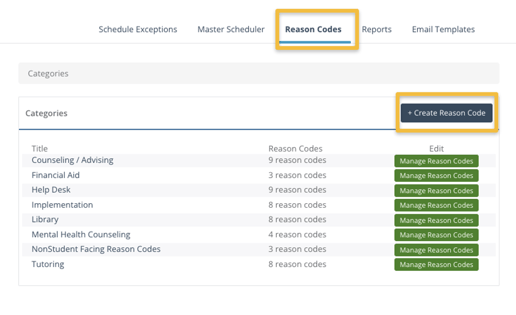
Create new reason codes in the Scheduling Control Center.
Customization
The Add Reason Code Form shown in Figure 3, shows the fields that will be completed upon creation.
The Reason Code ID, Display Title, and Description of the master reason code can not be edited at the group level. However, all fields below the description box, can be edited at the Group level to suit the unique needs of each campus group. Changes made at the group level will not affect the master reason code stored in the repository in Scheduling Control Center.
Figure 3
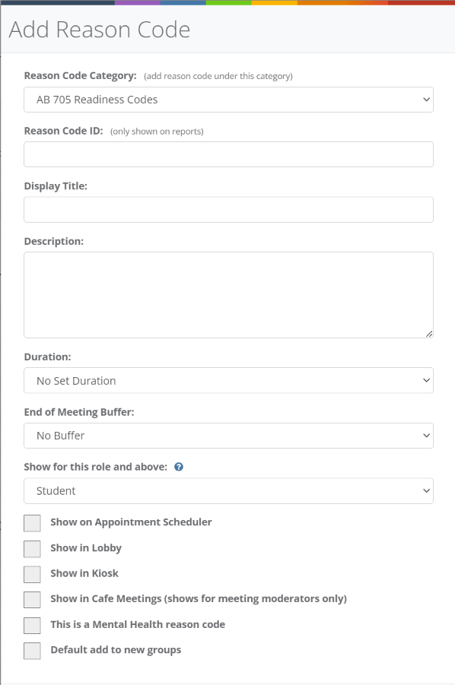
Fields for Customizing a Reason Code
- Reason Code Category: Select from the existing categories, which are created by ConexED Administrators via the Admin Panel.
- Reason Code ID: Create an ID for the new Reason Code for reporting purposes. Best Practice would be to abbreviate the reason code ID, for example, FA for Financial Aid. Please note: For California schools with a MIS export integration, use this field for the MIS code.
- Display Title: Write the full title of the Reason Code that will be displayed.
- Description: Optionally, provide a description to accompany the title where displayed.
- Duration: Set the default meeting length for a meeting with this reason code.
- End of Meeting Buffer: Optionally, add a buffer to extend the meeting duration for the user. Using a buffer prevents back to back scheduled appointments.
- Show for This Role and Above: Determine whether or not students can see/select this Reason Code or if it can only be seen/selected by users with specific roles.
- Show on Appointment Scheduler: Check this box if the Reason Code should appear on the Scheduler. Best practice is to select this option for almost all reason codes.
- Show in Lobby: Check this box if the Reason Code should appear on as an option in the Virtual Lobby.
- Show in Kiosk: Check this box if the Reason Code should appear when students are checking in via a Kiosk.
- Show in Cafe Meetings: Check if staff should be able to see this Reason Code in the appointment details. Best practice is to select this option for almost all reason codes.
- This is a Mental Health Reason Code: Selecting this option this puts a red outline around the Reason Code on reports and hides any meetings with this reason code from other groups/individuals.
- Default Add to New Groups: Check this to automatically add this Reason Code to all new groups’ Reason Codes.