-1.png?width=360&height=66&name=Untitled%20design%20(4)-1.png)
ConexED Group Users with the Front Desk Agent role and above can see when a student is waiting in a locked lobby. This resource explains how to connect with students in a locked lobby and manage locked and unlocked lobbies.
Locking and Unlocking a Lobby
Lobbies are set to lock nightly and will need to be unlocked each morning or when you open. To lock or unlock the lobby follow these steps:
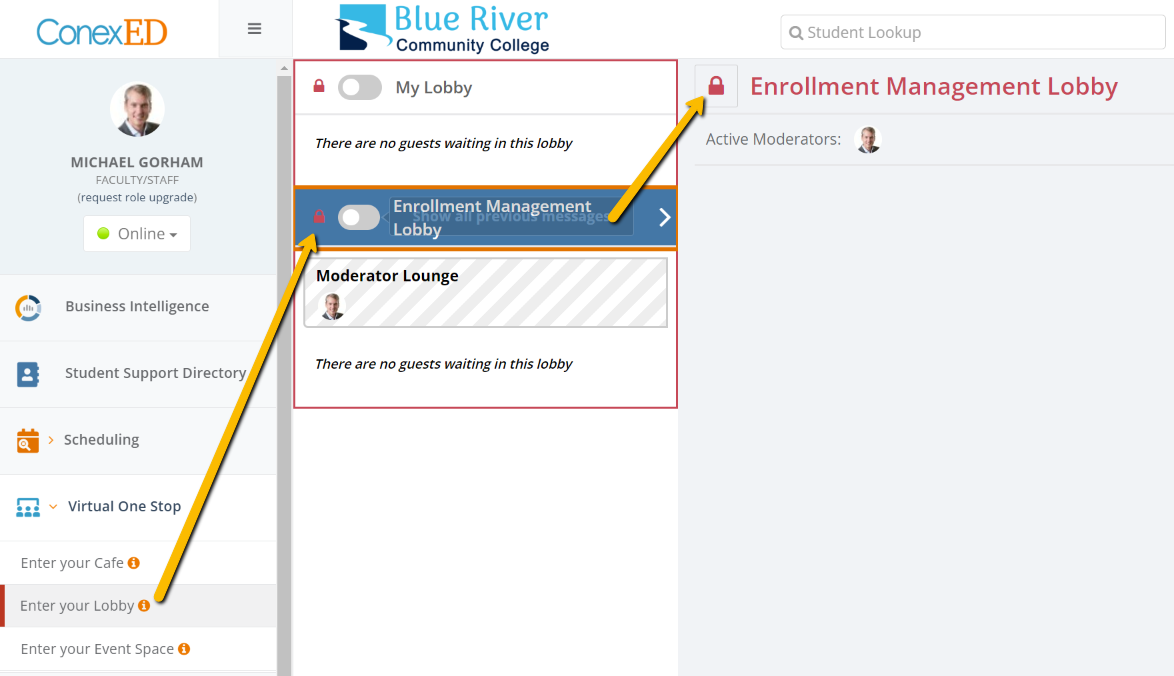
- Select “Virtual One Stop” on the User Panel.
- Click on "Enter your Lobby".
- Select the name of the specific Lobby that you wish to unlock.
- Click the Lock icon next to the Lobby Title.
Student in Locked Lobby
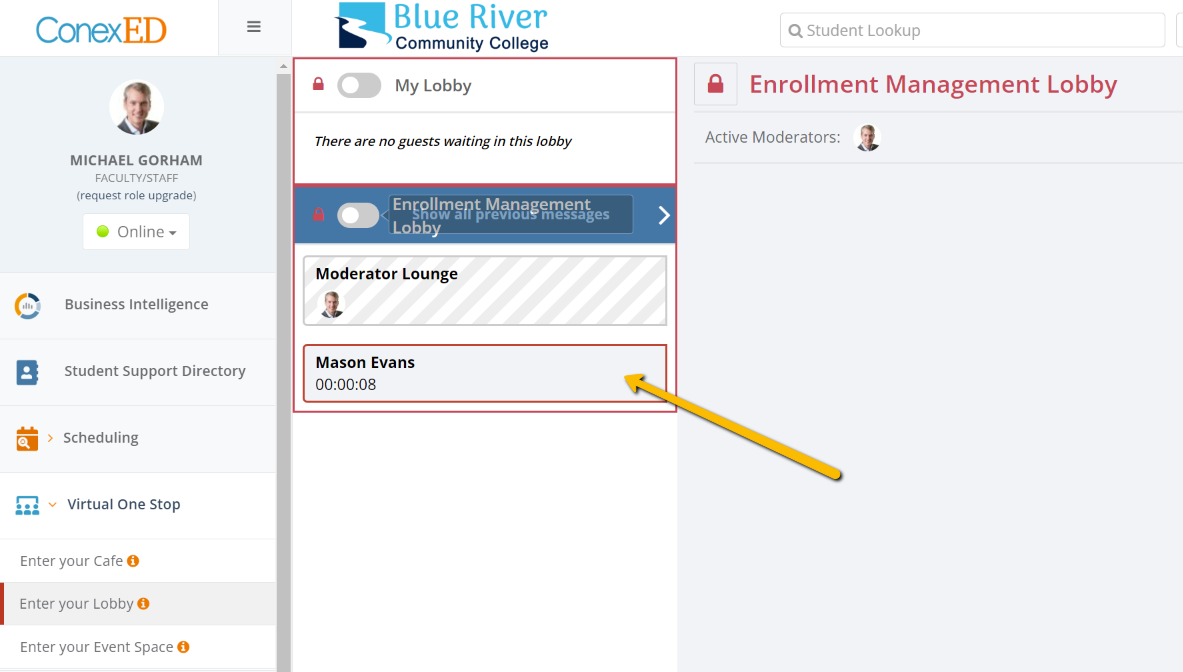
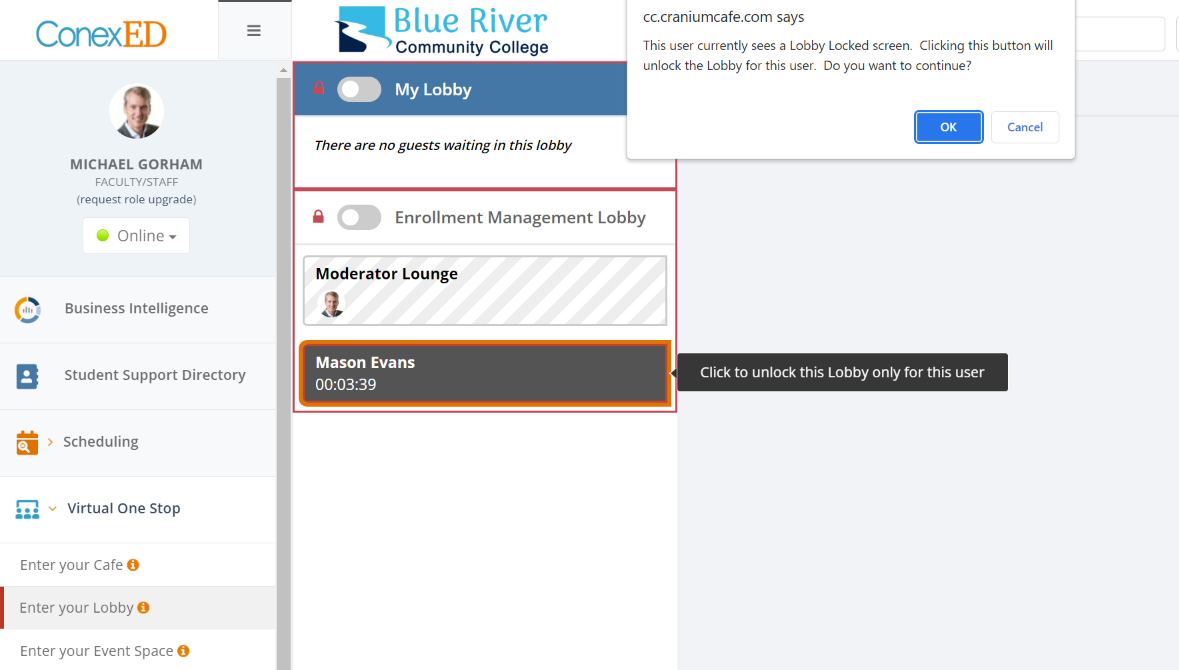
Group users will see the names of students who are pending in a locked lobby. The names will be shown in a red outline.
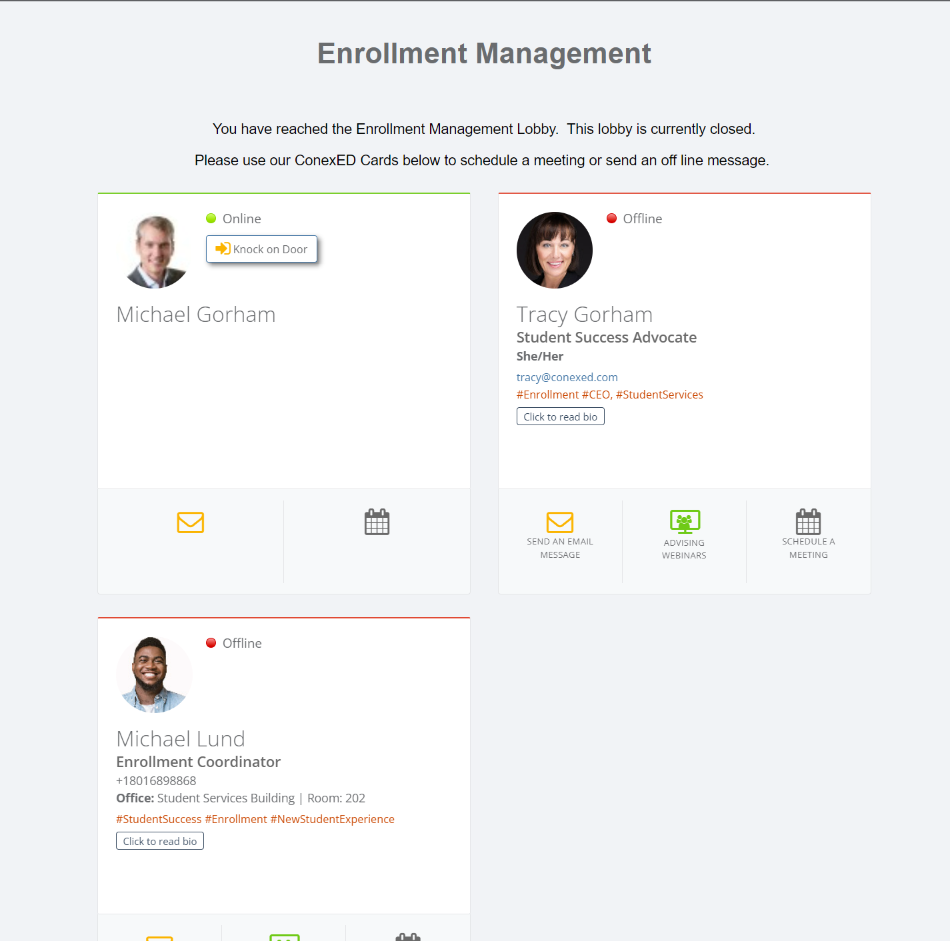
Students or guests in the locked lobby will see the locked lobby message unless they are manually added to the lobby or the lobby is unlocked. Note: The locked lobby may be customized in the group settings by a user with the group manager role or higher.
Adding Student to a Locked Lobby
A Group User can manually unlock the lobby for a single user by selecting the name of the student. This will produce a message that can be agreed to, which will add the student to the lobby.
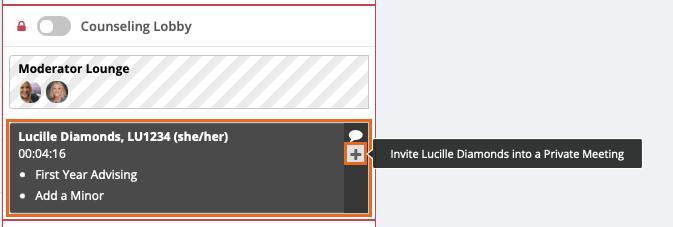
Once the student is added to the locked lobby, the group user will see the menu options appear next to the student’s name to chat or to invite the student into a meeting.