-1.png?width=360&height=66&name=Untitled%20design%20(4)-1.png)
Reason Codes & Role Boundary
Reason Codes drive data capture. The reason codes identify both WHY an interaction is set to happen, and What happened during the interaction.
Some reason codes are used to schedule appointments, track drop-ins, sign into a queue, or select as an option on a self-serve kiosk. For example, "First year Advising Meeting". These codes are called Scheduled Reason Codes.
Other reason codes are used to track the data related to what transpired during an interaction. For Example, "Course Registration", "Update Academic Plan", or "Add/Drop a Class". These codes are called Reported Reason Codes.
In addition, some reason codes may need to have restriction for use. A user with a Student role may not need to select or view a specific reason code, but someone with a faculty/staff role may need to do just that.
The Role Boundary allows reason codes to be customized for specific use at the Group Level. In this way, the master reason codes that are created can be edited at the group level as needed to render them scheduled codes, reported codes, or codes with restricted use.
A user with a Group Manager, Department Director, or ConexED Administrator role that is assigned to a group as a Group Administrator can customize the Role Boundary for a Reason Code by following these steps:
- Navigate to the Group Reason Code Tab.
- Click on the green Edit button aligned to the reason code you wish to modify, as shown below in Figure 1.
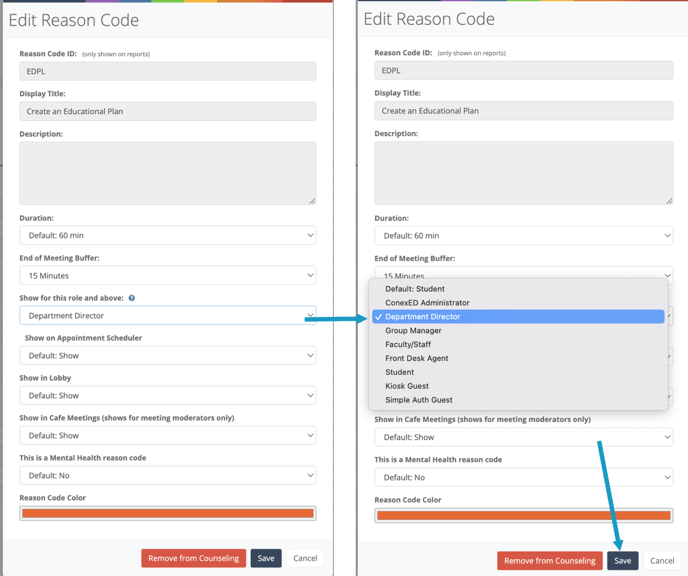
- On the Edit Reason Code modal, you will see the option that reads "Show for this role and above" field, as shown below in Figure 2.
- Select the desired role from the drop down list.
- Click Save.
Figure 1
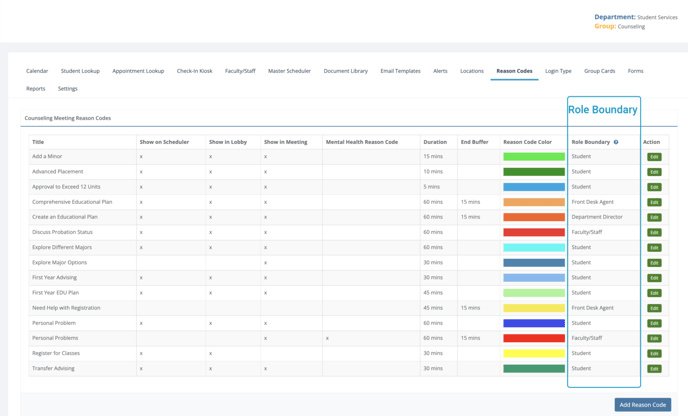
Figure 2